
In this example we will see how to create a project using OrderManagement entities.
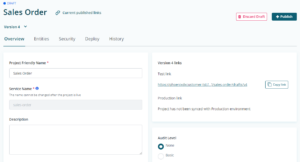
Launch the Hubway Builder and create a new project.
Enter a project name in the friendly name field. The service name will be auto-generated, and you can choose to modify the service name if required.
Navigate to the Entities tab of the Project. Search for OrderManagement. This will display all the OutSystems entities within the Order Management module in the left pane.
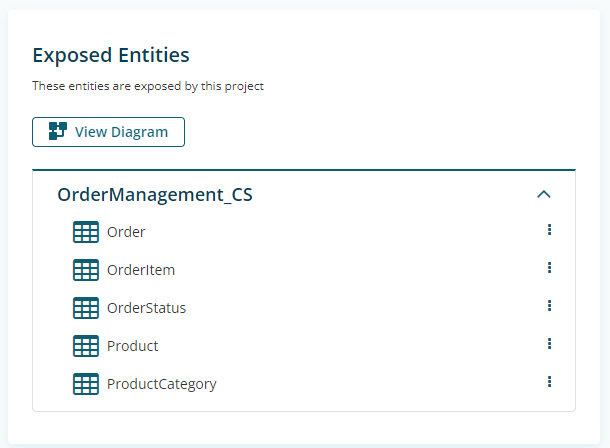
Tick the checkbox next to the following entities: Order, OrderItem, Product, ProductCategory and OrderStatus. Then click Add selected.
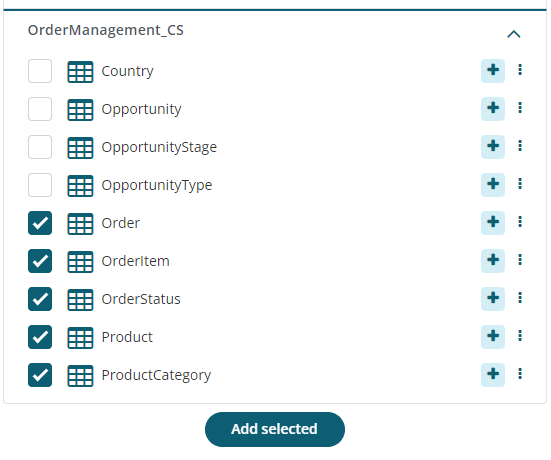
Alternatively, you can also click the (+) icon on the right side of each entity and add them one by one. This will add the entities to the Exposed Entities section on the right pane.
For this demo, you can leave the security settings as default and allow the service to be accessible to any valid user account.
Click the Publish button. This will generate the service endpoint URL.